Showing posts with label Rainbow. Show all posts

Tuesday, February 3, 2015

Ultimate Gummy Bear Cake

This has got to be one of the most outrages and memorable cakes I've made this year, and it's only February! I got the order for a gummy bear encrusted cake. Sounds simple enough except it had to be colour sorted and arranged in rainbow layers. One thing you don't realise is how many gummy bears it takes to cover a 11" round cake that is 8" high. Like a lot!

More Gummy Bears Than You Can Count

Assembling this cake was thoroughly therapeutic, though I realised this is one of those OCD nightmare situation - not a colour out of place, no alignment issues and no missing spots please. When I was finally done, it was nothing short of a bejeweled armour - a squishy, chewy, fruity one.

Bejeweled Blitz

The cake is a 4-layer moist chocolate cake covered in a satiny Swiss Meringue Buttercream. It was Mummy E who suggested a dark cake inside to contrast the colourful bright outside. The result was stunning. The kids went wild, of course.

Chocolate Surprise

If you were at the Candylicious boutique over the weekend and wondered where all the gummy bears went, well, now you know.


Monday, November 4, 2013

My Little Pony Mania

October was the month of My Little Pony cakes! It seemed like every mummy who got in touch with me requested for the pretty ponies for their little ones. I think the rainbow coloured ponies must be enjoying some kind of resurgence in popularity because even McDonald's is packaging their Happy Meals with My Little Pony toys.

I was very happy to make these MLP cakes again as I really enjoyed my first effort for a friend's daughter some time back. I made a total of 4 MLP cakes, with one special order for sisters who were celebrating their birthdays together so I made two cakes with a connecting rainbow! A bit of fondant engineering challenge there.

Here are the 4 cakes...

1. Giselle's 1st Birthday

Simple and Sweet

This cake ordered by Mummy V is a bit of a rehash of my first MLP cake. She didn't want 3D fondant nor toppers so I went with this 2D version of 'Sweetie Belle'. I love make the My Little Pony this way as it stands out enough to make an impact on the cake. I especially love the flowing mane! This was a simple orange sponge cake for a small party.


2. Matilda's 1st Birthday

Field of ponies

A friend wanted the MLP theme for her daughter's first birthday. They had the party decorated with all things pony from the banners to the goodie bags, piƱata and even labels the drink bottles! Naturally, a MLP cake would complete the celebration. Mummy M is a busy busy lady so she picked up some toppers and came by to discuss the cake with me. We decided on a rectangular cake - always good for cutting and serving up with a standing rainbow. A couple of days before the party, I went by to McDonald's to get a drink and saw the Happy Meal giving away My Little Pony figurines. It was my first Happy Meal in ages.


3. Kaira's 6th Birthday

Just add ponies

Kaira was going to have a pool party for her birthday so her mummy was a bit hesitant about a fondant cake being out in the open for some hours. Hence, they requested for a cream cake instead. Now having made fondant cakes for most orders, I was suddenly a bit lost as to how to make a standard cream cake. As you all know I don't do buttercream because I don't use shortening and butter alone won't hold in our weather, so I turned to cream cheese. This is a chocolate cake where the sides are frosted and the border piped with sweetened cream cheese that is coloured. I left the 'lane' exposed as chocolate with some green grass frosting on either side. Ask me for this if you'd like a fondant alternative.


4. Lauren and Shauna's Birthday

Little twin cakes

This cake combo is for two sisters whose birthdays are quite close so Mummy K thought to combine the celebration. Big sister Lauren gets a rainbow cake with a stream running through it, while Shauna meimei gets a elevated cloud cake. The two cakes are connected by a gum paste rainbow that straddles both cakes. The challenge here is that Mummy K had to do the assembling herself. For ease of transporting the cakes, the rainbow was not inserted and the cakes had to be assembled on site. I provided all the necessary 'tools' and here's the result of Mummy K's handiwork. Well done!


Saturday, October 19, 2013

Rainbow Cheesecake

After having made more rainbow cakes than I care to count, I am now adding another spectrum to my multi layer colour baking - the Rainbow Cheesecake.

I'm not sure how many of you saw it on your Facebook feed but there was a post that was making its rounds on social media on how to make a rainbow cheesecake. It looked absolutely delicious! My sister-in-law J was the first to post the tutorial on my timeline with a message - "Make this please!"


It was a matter of time that the rainbow starts to invade all sorts of baked goods. There was no better time to try this than for my hubby's cousin's 16th birthday. Her dad had contacted me to bake something for her Sweet 16, and being family who have been recipients of my cakes on almost all occasions, I was happy to try something new for once.

I didn't care for the recipe in the tutorial. Every baker has their own cheesecake recipe - if it works, don't try to mess things up. I figured the only additional step would be adding in the food colours into the cheesecake batter.

So here goes...


Technicolor Cheesecake

The coloured batter spread like a dream. I think the next time I try this, I will make more batter to get one or two more colours in. The hubby also suggested that I could do a monochrome ombre cheesecake - Hunny, consider it done! :)

Anyway, the birthday girl was totally surprised when she saw the cake (even I couldn't stop looking at the cake after taking it out of the oven). She loves cheesecake and this was the ultimate birthday cake!

Happy Birthday Christel


Wednesday, October 2, 2013

An Education in VW Kombi

I can't believe it's October already! I haven't had much time to update the blog on the cakes I've been busy with. In the past weeks, I had the pleasure of repeating some fun designs like the Fire Engine and Honeybee cupcakes, as well as some cheery Sunflower cupcakes for my niece's 17th birthday, but the one cake I have to share with you is the VW Kombi cake!

I was contacted by some Kombi enthusiasts for a series of Kombi van cakes. While I do recognise the iconic camper van, I can't say I know the vehicle in great detail. I have also underestimated what it meant to make a cake for enthusiasts (of any subject). You just could not afford to be too casual about details. My first brief was for a rainbow-coloured Kombi with peace sign in place of the VW logo. As the van needed to look like it's painted, that's just what I did. I painted on the rainbow colours on the body of the van (with edible paints and gin). It was my first time painting on fondant but some tips online really helped out. 

I baked blocks of chocolate cake and carved out the shape of the Kombi, had it covered in fondant and laid the paintwork. Yes I did feel a bit like a mechanic for car body kit. Here's the Kombi taking a test drive...

Front View 
Back View

Unfortunately, this Kombi never made it beyond a test drive. I was told flat out that the recipient of the cake was rejecting it! It's a first for me and boy did it hurt :(

To begin with, I didn't get the shape of the Kombi right, the slope in the front was way too exaggerated. Then the sides looked somewhat saggy, which could be due to the double layer fondant I applied (I also realise my cake could have been a bit too moist, causing the internal structure to buckle). But finally, the reason it was not road worthy was that while the cake waited for the day of the party (1.5 days) in it's air-conditioned 'garage', it finally had a meltdown. I recommended it didn't go into refrigeration for fear of the colours weeping but looks like air-conditioning didn't do the trick.

Lesson learnt, fondant cakes wait for no man. Bake it, eat it.

I was quite wrecked from the experience (mostly from the rejection and feeling bad for the whole situation). While I'll take the rep for the many things that went wrong, it was still good cake and an honest effort. In the end, I had another chance to make it right. This time I was given many pictures of the Kombi to study, and boy did I look long and hard. The cake I had to replicate is this very adorable Kombi called 'Blue'.

'Blue'

And this time, I nailed it. 
Thanks for the opportunity. 
Kombi rocks!


Monday, July 8, 2013

Huat Ah!

I come from a family of avid mahjong players. I grew up familiar with the racket of mahjong tiles clacking around the house and inherently know all the high (pong!) and low (grunts from a loser) sounds of the game. No family function is ever complete without a few rounds of mahjong and I've had some cousins who were almost born at the table! My mother at 73 is still at the top of her game. But, guess what, I don't play mahjong. The constant drone of mahjong makes me feel numb; every time I hear those tiles, I get bored, very bored.

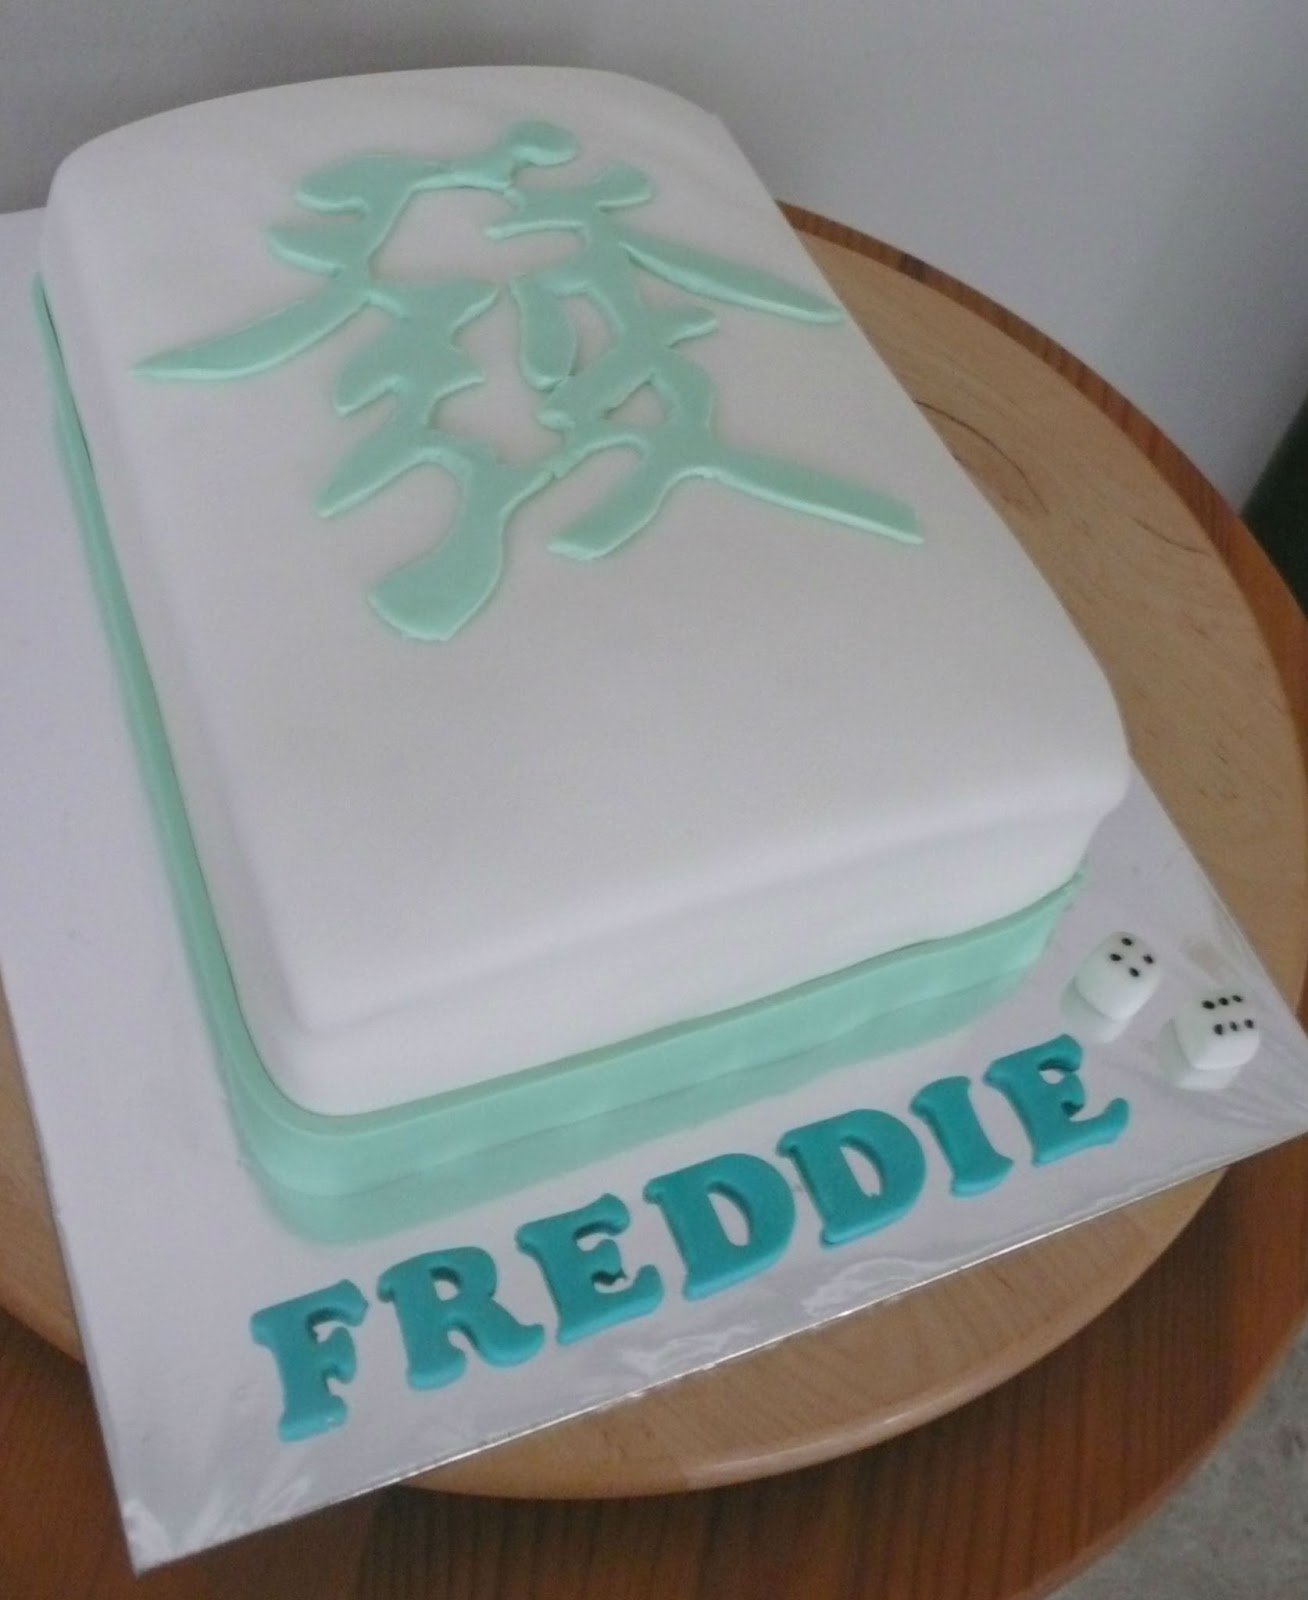
I may have missed out on the necessary DNA to play mahjong, but I sure can make a mahjong cake. Considering my disinterest in the game, I was quite excited to get a cake request for the ē™¼ ('fa cai'; prosperity) mahjong tile with a rainbow cake inside. It's my first mahjong cake and making it came quite naturally to me - thanks to those years of packing up mahjong tiles for my mum after the game.

I usually only make round rainbow cakes but I made an exception here and baked the six layers one at a time as I only had one rectangular pan. It was simple enough to cover the cake, one layer of white fondant, followed by a green trimming for the back of the tile. Then came the tricky bit which is carving the chinese character ē™¼.

Here goes...


Happy Birthday Freddie

Birthday boy F had his mahjong and ate it too! Let's hope this brings him lots of good luck at the table.


HUAT AH!

Saturday, June 29, 2013

Madison's Giraffe

Remember how in older housing estates you always had a neighbourhood bakery you can count on for cakes for all occasions, or a sweet treat whenever... well, I've become that - the friendly neighbourhood baker.

My neighbour in the opposite block has the easy convenience of ordering and picking cakes up from me. She can literally gesture from her window, across the swimming pool, to me for another red velvet cake please. So when her daughter's 3rd birthday came round, she had yet another excuse for a cake from her neighbourhood baker.

Mummy D is hooked on my red velvet. She's also been meaning to try my rainbow cake but the red velvet always get in the way. So for her daughter's birthday, it's finally the rainbow cake! Her only design requirement - must have M's favourite animal, the giraffe!

While I love colourful children's cake with all sorts of fun trimmings and embellishment, I think there is nothing classier than a minimal design cake that focuses on one or two elements. So here's what I came up with...

Less is More

A rainbow that is neatly covered in soft pink fondant and simple trimming that ends with a fondant bow. I made a little fondant giraffe with blushing cheeks and topped the cake of with a name tag for the birthday girl. You really don't need anything more than a candle to this. Besides, you can let the colours inside do all the wow-ing!

Happy Birthday Maddie


Monday, May 13, 2013

Tayo and Friends

The Korean wave is not confined to pop bands and soap opera, we've now got children's programmes and toys from Korea that's as big a hit as Mickey Mouse and Thomas the Train... well almost. You know the Korean characters are catching up when you start getting cake request for it.

A mummy who came across my cake at her son's preschool looked me up for a Tayo the Little Bus cake. I'm familiar with Tayo because my two sons are fans as well. Tayo is a Korean animation series about a little blue bus and his friends, which include other modes of transport like taxis, police cars, fire engine, trains and construction equipment. It's somewhat educational as the adventures of the little city bus impart lessons like how to cross the road safely and speeding is dangerous, etc.

Mummy S was quite resourceful in scouring online stores for the Tayo toy characters, which means I was spared having to fondant a bus or fire engine. She found a nice deal on G-market for the toys. It was tempting to put a few of the characters on the cake but I suggested to go with just one to make it stand out. The birthday boy finally decided on Frank the Fire Engine.

I made a rainbow cake - buttermilk cake recipe with cream cheese filling - covered in white fondant. Then I decorated the sides with rainbow garage doors like in the series. With the remaining coloured fondant, I cut out many stars and dotted it all around the cake. Check it out...


Frank the Fire Engine takes top spot

Happy Birthday Joshua

I was just thinking of how to cover the cake board. Looking at the many artisan bakers I admire, they  usually have their cake boards decorated. I read somewhere that it's unprofessional to leave it bare. I hardly ever cover my cake boards, I find it a total waste of fondant! It's bound for the bin once the cake is served :( Instead of covering the entire board, I decided to be a bit creative and rolled out ropes of fondant to encircle the cake, then added stars with the No.3 to the corners (Joshua is 3!)

Tell me what you think - do cake boards need to be covered? I'd love to hear from anyone ; )


Wednesday, April 10, 2013

Cake Out in Jakarta

Here's another one of my random musings about a baker's life. So I was in Jakarta last month and I've discovered that the Rainbow cake and Red Velvet cakes are hugely popular in the Indonesian capital! My hubby joked that my business would boom if I started baking there. Then I found out from my Indon friends that 2012 was the height of the coloured cake craze. Still, the demand is apparent seeing how many cafes, restaurants, supermarket counters and cake shops offer the multi-coloured cake.

This called for a bit of investigative tasting.

I went to Pacific Place, one of the many upscale shopping malls in Jakarta. There's a lovely cafe there called The Goods Dept Cafe & Diner. It reminds me of the first P.S. Cafe. It's actually a store selling exclusive imports as well as local designer goods from apparel to accessories and lifestyle products, books and gifts. I zoomed into the cafe as the cakes in the display caught my eye!

Here's the Red Velvet cake. Five layers of dense chocolate-flavoured crimson cake with cream cheese frosting in between and topped with cake crumbs.

Flatiron of red velvet

The cake looked impressive and at Rp 60,000 (approx USD6) a piece, it's considered a pricey confectionery. It's got good flavour but a little dry for my liking. The cake is very dense so although it's a modest slice, it was a feat to finish. 

And here's the Rainbow cake (also Rp 60,000). I've made so many Rainbow cakes but have yet to really sit down to eat a piece. The colours were perfect, so I was eager to find out how this tasted. 

Pelangi Pelangi ('rainbow' in Bahasa)

There is something quite artificial about the cake. I couldn't decide if it was my brain playing tricks because the colours were just too vibrant to be food. But I do believe this cake is not butter-based, probably oil-based which is not ideal for taste if there is no other flavour anchoring it - i.e. chocolate, banana cinnamon, etc. Having said that, it's just gorgeous to look at.

The perfect coffee break

I wanted to try out a few more Rainbow cakes, I really did... but I've come to the conclusion that I enjoy baking more than eating cake. Is that possible? If you're curious about how popular these cakes are, you only need to google 'rainbow cake' and 'Jakarta'.

Here's what you'll typically see in cake shops in Jakarta, Rainbow cake by the slice in the top shelf!

Dapur Cokelat Shop

The Harvest Patissier

Monday, March 18, 2013

Hello Kitty #3

There you go... Hello Kitty is requested again. This time it's from a thoughtful bride-to-be who ordered this cake for her baby niece who turns one on the wedding day. I thought it was really sweet of her to take the time to plan a little birthday surprise for her niece in the midst of all that wedding preparation. She saw my Hello Kitty #2 and knew it was just the cake for the occasion. Her wedding theme is rainbow and the birthday girl's mummy (bride's sister) loves Hello Kitty.

Here's Hello Kitty with a wedding touch

Happy Birthday Cordelia

Congrats Felise & Brian and all the best!

Thursday, January 17, 2013

Hello Kitty #2

Adding to my Hello Kitty cakes is a decked high creation featuring Kitty at the top! I bought a special Hello Kitty bakeware for this and was really excited to use it.

Makes cute little Hello Kitty cakes

An ex-colleague from my days at Sony contacted me for a cake for her daughter's birthday celebration at school and I was told it must be a rainbow cake and a Hello Kitty one at that. Since it's hard to make a layered cake that's irregular shaped simply because I usually only have one of such pans (with the exception of round ones),  I suggested a regular round rainbow cake that's topped off with a fondant covered Hello Kitty. 

I made my regular Vanilla Butter batter, divided it into 5 portions for colouring with some left to fill the Hello Kitty pan. The pan is such a perfect size, it's great for mini cakes or a topper for part of a bigger cake and the grooves makes it an easy guide to add on Hello Kitty's features. I only have one complain, it was somewhat difficult to remove the baked cake. I had carefully loosened the sides but the cake was not coming off easily. I was careful not to lose any bits since Hello Kitty's face was at the bottom of the pan but alas, bits of the cake stuck to the base :( And yes, I did oil the pan generously! I hope a few more bakes will season the pan. More Hello Kitty cakes anyone?

So while the shape of Hello Kitty is perfect, the surface was a bit rough. I rectified it with 2 layers of fondant or I could have been more generous with the cream frosting. The result was not too bad.

Hello Kitty on top

Little bow and colourful M&Ms for the border

Happy Birthday Ning!

The birthday girl shared the cake with her classmates and the rainbow cake made the children smile but it was hard work for the adults to cut up and serve. So the next thing on my agenda is coming up with a simple guide on how best to cut and serve a rainbow cake that is 15cm tall. Look out for it!

Thursday, December 13, 2012

Cakes in a Jar

Some weeks back, my friend Eve (thebottomsupblog.com) got me to bake a rainbow cake for her hubby, I blogged about it here. She had put together a rainbow themed party with a dessert table that was totally eye candy, you can read about it at her blog.

Now to back track a little, Eve had actually asked at that time if I could try baking in jars. She found a great idea online to make little gifts out of cakes in jars. She wanted the rainbow cake to be inside individual jars that could be given away to her guests at the party, which is genius!

Unfortunately, I just didn't have the time then to try it out and we couldn't get the most appropriate jars for the job. Well Eve, I just gave it a shot with those nifty Ikea mini jars and it turned out brilliant :)

This is what I did...

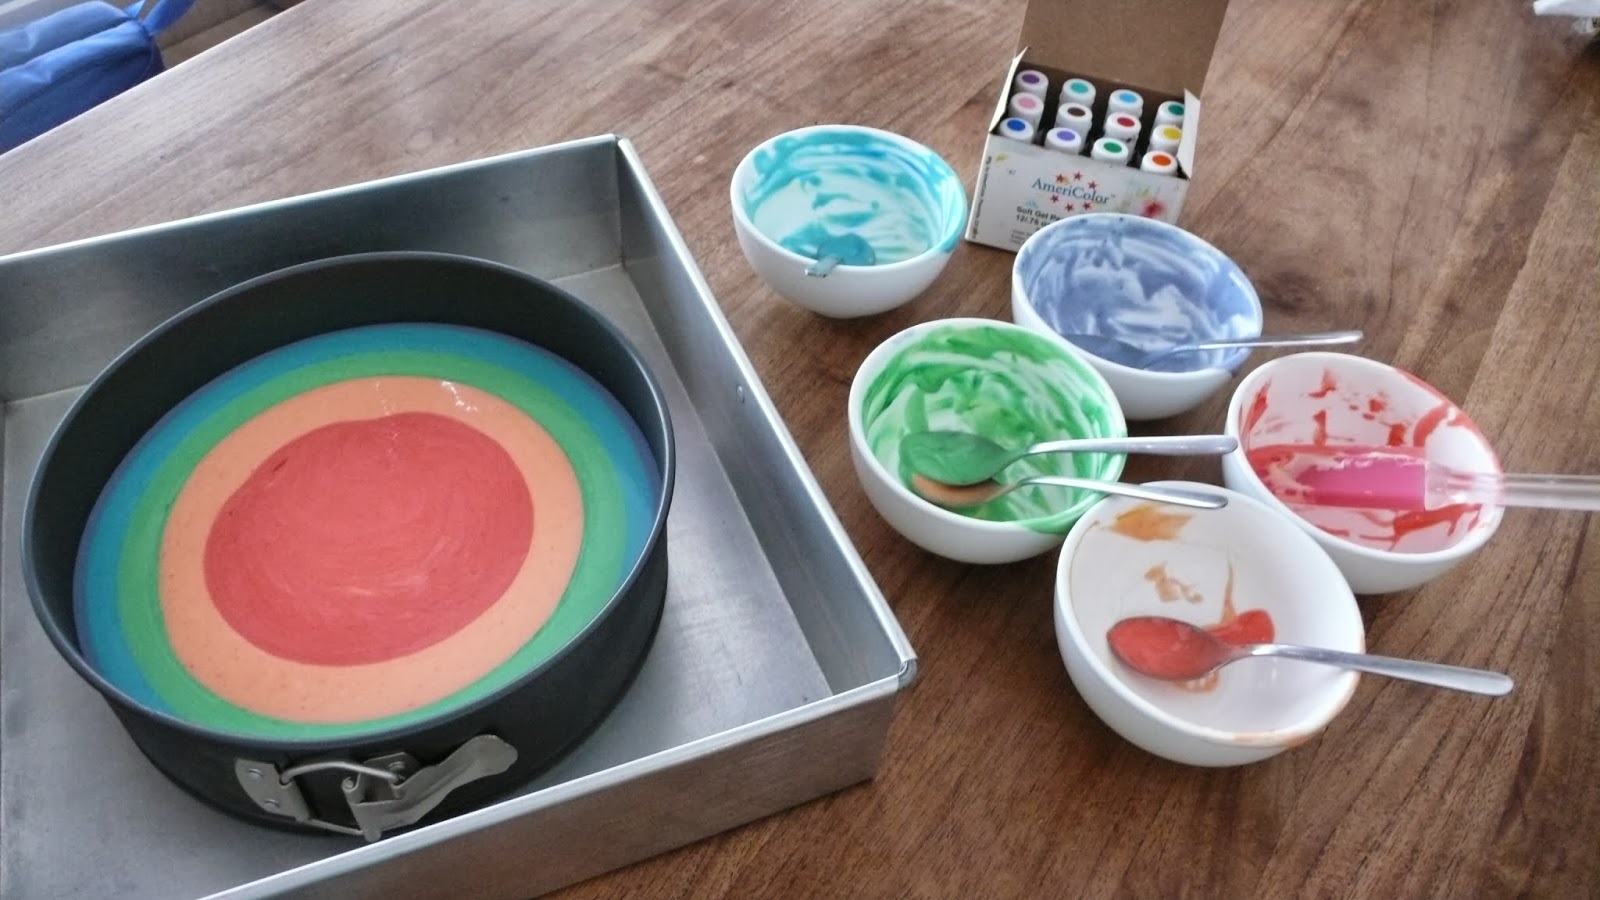
Prepare the rainbow cake batter and placed the individual coloured batter in piping bags.

Colours ready to go

Before using the the glass jars, sterlise with hot water and then make sure it is completely dry. Then grease the inside with a little butter or canola oil.

Recognise these jars?

Fill the glass jars one layer of colour at a time. Make sure to press the batter against the wall of the jar as that will give you the coloured layer look. Admittedly, these Ikea jars are not the best glassware for the job - it's irregular shaped and the opening is narrow. For best results, get straight jars with large opening.

Fill to the half way mark

These jars are too full 

As you can see from the picture, my jars are too full - ideally they should be 50-60% filled, leaving room for expansion. There was major overflow while the cakes baked but with some cleaning up, it turned out alright.

Jar full of rainbow

I made these for my dear cousin's surprise birthday. I decorated it with her name using art paper and glitter crayon. There's so many ways you could dress up these jars, they really do make great gifts!

Happy Birthday Gopi

Eve, thanks for sharing this great idea! You have cake credit with me ; )


Tuesday, December 4, 2012

Castles for Princesses

I've always looked at princess castle cakes and thought to myself - That is just way too difficult! There's simply too many details and construction required to make a home fit for a princess. So you can imagine my trepidation when I was contacted for a princess castle cake.

A mummy who found me online wanted a rainbow cake for her daughter with a princess castle theme. It's a busy week (and month) for me so I told her honestly that I just didn't have the bandwidth to take on the bake job. However, I couldn't bear disappointing anyone especially since she was looking forward to a rainbow cake, so I suggested baking just the round cake with a simple design and she can find her daughter's favourite princess and castle toppers, which I'm sure would look perfect. I was glad she took up the idea coz I knew the toppers would do more justice than my many hours trying to make this work.

As luck would have it, the shops ran out of the castle toppers.

Desperately-seeking-castle mummy contacted me and asked if there was any way at all that I could craft two castles to add to the cake. She managed to get the princess toppers but it wouldn't be the same without the castles. She even sent me resource links and images for ideas on how to craft the castles! I have to admit, my interest was definitely piqued but more importantly, I couldn't possibly leave her stranded! Though it's a crazy period now leading up to Christmas, I found myself looking at youtube  for how to make a castle cake (and there are plenty!)

While looking at how I could do this, I found a website on how to coat the ice cream cones for the castle. The baker had a wonderful description of how she went about building her castle cake, it's a great one - check it out here. I like how she coated the cones with royal icing and rolled it in disco dust! And that's just what I did...


Pink Peaks

The royal icing dried smooth and hard which made it easy to handle for construction. And I love that pink (Americolor Soft Pink). It was a day of just playing with ice cream cones. These inverted cones easily fitted into the fat wafer cones you get with Macdonald's soft-serve ice cream, once that is done, you'll already get the basic idea of a castle tower.

Castle Cones

I made five castles with graduating heights to surround the back of the cake. To do that, I looked around my larder and found some wafer biscuits, had them cut to size and stacked to the height I wanted.

Tall, taller, tallest

I just wish I had more time to embellish the towers, as you can see the cones do look a bit naked at the bottom. I made it up by pipping some 'green grass' and sprinkled some confetti flowers to make it look like flower bushes. Another thing I did was put little flags at the top of the tower cone, it's a small detail that didn't require a lot of work but added to the look visually. Simply cut out some art paper into triangles and stick it down with some fondant.

Tower 1

Latest castle development

I had the cake delivered to the school where little Jmie was going to celebrate her 2nd birthday with her classmates. Her mummy met me to assemble the princesses on the cake for the finishing touch. I was told Aeriel the mermaid princess is her favourite, so naturally she got the main spot on the cake.

Sitting pretty

Happy Birthday Jmie

While I came through for Jmie and mummy with the castles, at the same time, I have them to thank for pushing me to overcome this mental block for castle cakes. I've learnt a lot making this cake and wouldn't mind doing it all over again.

Sunday, December 2, 2012

Another year older

My son turned 3 last week... where did the time go!? I remember last year this time, I was making one of my very first novelty cakes – an Elmo cake for Jake's 2nd birthday! Then 8 months later, my younger son James got a two-tier fondant Thomas the Train cake. And all the cakes made between then and now for good friends and new friends have been such an amazing experience! I'm constantly thankful for being able to stay home with my boys while pursuing my passion for baking.

So what did Jake get this year... well, he didn't get just one cake, he got three!

Cake No.1 
Here comes the rainbow train...

I made a simple round cake and covered it in baby blue fondant. Inside is Jake's favourite rainbow cake; multi-coloured layers of vanilla butter cake with cream cheese frosting! I found an amazing train candle holder that I know Jake would love to have on his cake. It's a great toy too since you can chain link all the trains - it comes in 5 colours! Then M&Ms for the border and a happy face on his cake. It was simple enough but oh so fun to look at and play with after.

Happiness in a cake

Cake No.2
Thomas and friends
Trains and tunnels

There is no running away from a Thomas the Train cake. Jake's love for Thomas is still as fervent as ever so it would be unthinkable to not make a Thomas cake for his birthday. I opted for an easy way to do this cake. I found some cupcake toppers of Thomas, James and Percy (all his favourite trains) and so I decided to just set the scene with the cake. Now if you recall a recent post on gum paste where I made a standing rainbow, you'd know why I chose to make a brick wall. However, I have to say I'm quite disappointed with the Satin Ice brand of gum paste, it didn't dry out hard even after a whole night of air-conditioning! Sadly the brick wall was not as sturdy as I would have liked it but some toothpick foundations did the trick. I'm sticking with Wilton from now on.

I also love my brick wall embossing pattern, it turned out very nicely. Then I made three little tunnels from which the trains look like they are emerging. The tracks are made of chocolate Kit Kat pieces - many of which ended up in the mouth as I chugged along. The cake was simple enough, not my best effort but it made the boy's day nonetheless ; )


Cake No.3
I actually forgot to take a proper pic of this third cake. It was a rainbow cake of course. Here's one of the boy and his cake at school. 

Happy Birthday Jake