Showing posts with label Flowers. Show all posts

Monday, March 24, 2014

Buds, Blooms and Beyond

I'm going to blog about cakes I made over Valentine's Day... I'm still behind on my updates as you can see. Anyway, as I was saying...

You may have read my earlier entry about the master class I took with Joyliciouscake for making sugar flowers. Well, I was very fortunate to be able to apply what I learnt as Valentine's Day came round and I was asked by some devoted husbands to create something special for their wives.

Now, we know Valentine's Day is the one day in a year that florists of any grade make all their money. So this baker was going to give them a run for their money, at least with the two lovely gentlemen, who wanted flowers that their wives can eat instead of watch wither.

Hubby No.1 is based in San Francisco, and he asked if I could create a Valentine's Day cake for his wife here in Singapore. At first his idea was for me to make a cake in the shape of a branded handbag, but I told him that it's one thing to make edible flowers, it's another to make edible bags. Some things are best in actual form...and leather bags are one of those things - agree ladies?

So here's the expression of love I made on his behalf - a Tiffany blue heart shaped cake topped with more than a dozen red roses. Each rose was lovingly handmade, petal by petal.

"Our love can traverse any distance"

I delivered the cake first thing on V-day, to catch her before she went to work. I knocked on her door bright and early at 7:30am, after being told she leaves the house about 7:45am only to find that I had woken the household! She had overslept! So she was saved by the (door)bell, and received a total surprise on V-day morning. I only wished her hubby could see the sheer delight on her face. 


Hubby No.2 requested for a cake with flowers as it was his wife's birthday. She enjoys a good carrot cake and I was only too happy to make one with sweet cream cheese filling. Not enough people request for this, it's such a wonderful wholesome cake. 

Again I made roses in varying state of bloom, from rose buds, to small blooms to full petal roses. I also   put my lessons in floral arrangement to good use. It's one thing to be able to handcraft flowers, but being able to put it together in an aesthetic way makes all the difference. I have my amazing instructor Joyce to thank, apart from a master sugar artist, she's also an expert in floral arrangement.
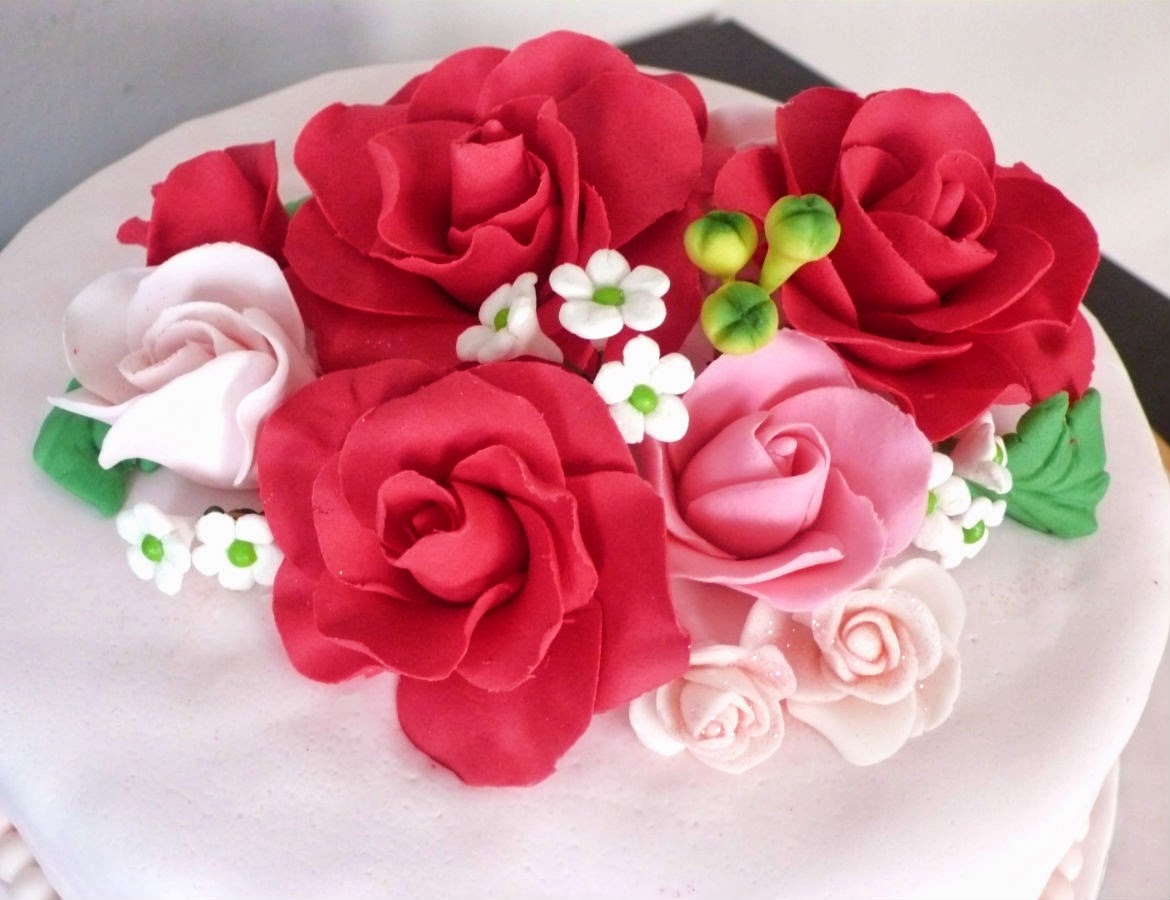
Happy Birthday Darling

Roses are red,
Violets are blue,
When you need to say I love you,
Bake a cake. 

                        -- debbie


Friday, February 7, 2014

A Date with Charming Flowers

It's that time of the year when my baking buddy Dawn comes back from Shanghai and we get up to all sort of baking goodness. This trip back, she arranged for us to learn sugar flowers! I have a deep affection for flowers and the inner florist in me had been eagerly looking forward to this course.

We spent almost 3 rewarding days with our sugar art  (god), Joyce from Joyliciouscakes. Lesson time with Joyce is sheer pleasure as she imparts her techniques on crafting sugar paste into the most realistic flowers you have ever seen. Joyce is a generous teacher, wonderful host and a truly supportive friend in baking. 

Here's the rundown of flowers we learnt in the 2.5 days we spent in her home studio...

Magnolia

Ranunculus

Rose

Hydrangea

Chincherinchee (my fave of the lot)

Hypericum Berries

Red Wild Berries

My Charming Bouquet

We also learnt to make fillers like Wild Ginger Blossoms, Poison Hemlock, Hydrangea buds and Magnolia buds. They may be small (and a bit of a pain to make, literally!) but they make all the difference when completing an arrangement.

All these flowers were patiently made by hand, bud by bud, petal by petal. It's definitely my most laborious work of art by far! Thank you Joyce for the wonderful tutorials.


Saturday, December 21, 2013

I Do

You know you've reached a milestone of sorts when you get to make a wedding cake for someone. That someone is a former colleague who truly believes in my baking and has no qualms that I never made a wedding cake ever! God bless her sweet soul.

This is a very special project for me for many reasons. I'm a hopeless romantic; a wedding cake symbolises the commitment to love in a very edible way. Marriage is a wonderful journey that I'm lucky to have embarked on with a kindred spirit - we are five years into ours - and I'm always happy to see friends making that lifelong promise to someone they love.

When the bride requested for me to bake her wedding cake, a million ideas raced through my mind. I was lucky to be given total creative autonomy. I told myself, keep it simple, focus on a few details and make those really stand out. So I proposed fresh flowers on a white fondant covered cake. She said yes!

Wedding cakes may seem simple enough, as compared to say a boy castle cake with towers and turrets, but in reality, it requires more finesse for that flawless finish. I prepped 2 dozen red and pink roses to go between the two-tiered cake. It's the first time I'm working with fresh flowers, it's totally stunning on a stark white fondant cake...makes me wonder why it's not more popular than sugarpaste flowers.  

Here's the first tier with flowers...

Red Velvet Cake + Roses

This is a red velvet cake covered in Wilton white fondant. The roses are nipped from the stalk and inserted with floral wires and assembled into a styrofoam disc about 5" smaller than the base cake. When that is done, the top tier is gently placed on top of the styrofoam disc. I topped the cake with 2 roses to represent the happy couple.

For Annie and George

While putting this cake together, I became slightly obsessed with ribbons! There are some wedding cakes that are embellished with nothing but ribbons and it's just too pretty! Some of the best examples I've seen of wedding cakes have nothing more than clever use of ribbons and a simple flower feature. I especially like this Singapore-based wedding cake boutique - Crummb - check out the website


All the best Annie & George!

Love is patient, love is kind. 1 Corinthians 13:4-7

Monday, May 27, 2013

Twenty Years of We Do

My brother and sister-in-law renewed their commitment to each other again after 20 years of marriage. In an age of so much brokenness - socially, politically, economically - keeping a marriage going for two decades is surely commendable.

So how did the happy couple celebrate the occasion? They booked a holiday bungalow, invited family and friends, catered a lovely feast, asked Fr Paul Staes and Fr John-Paul Tan for the renewal of vows, and got this sister to be in charge of cake and deco.

My brother wanted flower arrangements with a candle centrepiece for the dinner tables. He was quoted $80 - $100 per centrepiece from the florist, I balked at the price and convinced him to let me try out my hand at floral arrangement. At this point, I'll let you in on a childhood ambition of mine... I wanted to be a florist. I never acted on my interest (and I had many), but here's my chance, I had to create 8 centrepieces with a large candle block and red rose blooms.

Here's what I conjured for the celebration...


Wedding flowers

I love Ikea for the inexpensive candles that can be bought. I also have to thank Eileen from the Marine Terrace market for her lovely blooms and useful tips on arrangements. I bought 100 large red roses from her and those complementing hypericum berries and aster solidago.

And no I didn't forget that this is a cake blog, so here's the anniversary cake to go with the flowers. A deeply luscious red velvet with creamy cheese frosting topped with rose swirls.

Happy 20th Anniversary David & Rose

This is my cake of the month. I love the deep crimson and I make mine Miette style. I like assembling it this way as it shows the dramatic contrast between cake and frosting. I only realised this is similar to the famous Tomboy cake by San Francisco Miette bakery when my cousin who is in the baking business said 'Hey you make yours like Miette!' Here's Miette's version.

Tuesday, February 12, 2013

True Blue Girl

When I got the order for a Winx Club cake, I didn't think twice about getting a topper doll of the leggy magical fairy with pretty wings. Good thing too my friend who ordered the cake for her daughter's 7th birthday thought the same. The only requirement was for the colour theme to be turquoise and blue - birthday girl's favourite colour (she's got good taste!).

At this point, I have to share my extreme weakness for the colour turquoise, specifically a shade of blue that is softly aqua, deep ocean teal, robin egg blue, and of course there's the hue from Tiffany & Co. That colour does something to me, I have such a deep affection, I'm drawn to it like moth to a light (just ask the hubby, he has lost count of the blue boxes given over the years). I couldn't wait to cover this cake and put in the details.

How pretty is that blue!

Then things got ambitious.

My baker friend Dawn is back from Shanghai for the CNY holidays and I told her about the Winx cake I was making. Instantly, she generously offered her time and kind help so I skipped the idea of a topper and decided to go with fondant figurine of the character Bloom.

She offered so many great tips for moulding figurines and the tools that are essential for the job. I don't have much experience making figurines, mine tend to be the cherubic cartoon type so I was eager to learn. She was going to send me a step-by-step on developing the face, torso, arms, legs and hair, then tragedy struck! Instead of drying out overnight, our humidity got to the fairy figurine and she was a melty mess :( Dawn is used to working in drier, cooler climate and didn't anticipate that this weather just won't do fondant any favours. Someone tugboat this country up north already!

What it could have been... sigh

Dawn was devastated, I felt really bad for all her wasted effort. So it was back to a topper doll. There weren't any actual Winx cake toppers so I went out and bought Bloom, the Winx doll. With that sorted (and no chance of melting), I focused on decorating the cake.

The flowers
The butterflies
Curls and swirls of girliness

When it was all done, I was totally in love. It is definitely one of my most favourite cakes. I had the Bloom doll hold on to a scalloped cutout for the birthday girl's name. 

All's well that ends well ; )

Happy Birthday Aeryn 

Sunday, January 13, 2013

Hello Kitty #1 (and counting)

How do you love Hello Kitty? Let me count the ways...

I've made a few Hello Kitty cakes last year and I am so sure she will be in my lineup again this year that I invested in some more Hello Kitty bakeware and cutters!

My first Hello Kitty cake for 2013 is a pink and pretty affair. A friend referred a mummy to me who wanted a Kitty cake she saw online and asked if I could replicate it. Doing a copy is both easy and hard to do... it's simple since you don't really have to think much about the design as it is there for you, but it also means if you do a poor replica, it's easy to make a comparison.

Well, I set out to follow the colours and details as closely as I could but at some point, I made some variations (I just can't help it!) But thank goodness, it's well received ; )

Here's what's involved...

Round cake with a pink bow
Lots of little sparkly flowers
Hello Kitty

And here's the finished product for a birthday girl who shares her birthday with her grandma.

Happy Birthday Tata

And Happy Birthday Grandma

For those of you who may be curious to see the cake that this design is based on, click here for a peek ; )

Sunday, November 11, 2012

Epic Cake!

I took on an ambitious order and think I may have made 'The Cake' to date.

It was so nice to hear from an old school mate - she found out that I had this cake venture so she contacted me for a series of cakes for her daughters. Doesn't seem that long ago we were a couple of blue-uniformed schoolgirls running around CHIJ ; )

My friend's daughter celebrates her 5th birthday this month and I had the pleasure of baking her a My Little Pony cake! I remember the pastel-coloured ponies from my own childhood and I absolutely love the flowers, rainbows and hearts that surrounded the ponies. I went on to plan a cake that I would have loved for myself when I was 5 years old.

The birthday girl wanted Pinke Pie, Twilight Sparkle and Rainbow Dash on the cake. She also wanted flowers, hearts and ribbons. I don't' have daughters, my two sons want trains, trains and trains. So you can imagine my excitement at making this cake.

I quickly got to work on the embellishments.
First the flowers...

Little pansies in colours of the rainbow
Then the rainbow, hearts and bow...

Hearts are fun to make


Next comes the main feature... Pinkie Pie! In the days leading up to Pinkie Pie, I had actually gone to a party supply shop and found My Little Pony cake toppers! They were beautiful so I bought them and looked at them long and hard. There was no way I could have done a 3D pony with fondant or gum paste that would come close to the toppers. So I relented and decided to use toppers (my friends all say - "There's no shame in it!"). Still I could not accept not making a pony with fondant. So I decided to make Pinkie Pie myself. To differentiate from the toy toppers, I decided to make her 2D but work on her mane so it looks like it's blowing in the wind.

Pinkie Pie

I had her set on the top tier as the main feature...

Riding on a chocolate cake


Looking at this picture now, I kinda like the simplicity of Pinkie Pie on a plain fondant covered cake. But this was going to be my epic cake, so this is really just the start of putting it all together.

Rainbow delight 

The bottom tier is set on a plush buttercream green grass field dotted with flowers where Little Ponies run free. A pretty fondant rainbow brightens the design and adds extra sweetness.

Here's the complete stack. Notice the hearts on the cake, they stand out instead of lie flat on the cake. I got around to using gum paste and managed to make these hearts. They are great coz they harden up much better than fondant and could be used without losing its shape.

My Little Pony Paradise


Happy Birthday Aeriel